In modern computational science, running code is only half the challenge. The other half is managing the software environment it depends on. Different projects may require different compilers, libraries, or Python packages, and the ability to reproduce results across HPC systems, laptops, and cloud platforms is important.
This week, we will learn practical tools for creating and managing software environments:
Package managers (e.g.,
apt-get) for installing software at the system levelBuilding from source when precompiled packages are unavailable or when you do not have root access to the system.
HPC
modulefor loading different versions of software on a shared system.Python virtual environments for dependency isolation
Containers (i.e., Docker) for reproducibility and portability
Software Management Basics
On Unix/Linux systems, most software is installed through package managers, which automatically handle downloading, installing, and configuring programs and their dependencies.
Common package managers include:
By default, package managers install software system-wide, which
requires root (administrator) privileges.
On personal machines, this is often done by prefixing commands with
sudo (i.e., “superuser do”).
On shared systems such as HPC clusters, users typically do not have root access, so alternative approaches are used (modules, virtual environments, containers).
Here, we use Docker to create a sandbox environment where you can safely practice system-level package management commands. We will cover Docker in more detail later, but for now, assuming Docker is installed, you can start a sandbox with:
docker run -it --rm debian:forky-slimInside your Docker container, update the package list (always do this first):
apt update
Install a simple system utility (e.g.,
htop) and a scientific library (e.g., GNU Scientific Librarygsl):apt install -y htop apt install -y libgsl-devYou may now verify the installation:
htop                 # should start the process viewer
dpkg -l | grep gsl   # list installed gsl package
Building from Source
Not all software is available in package repositories or is prepared in a way that you want it. Sometimes the version provided by the package manager is outdated, or the software is not packaged at all. Sometimes you may want to enable some special settings or install a package in non-standard locations. In these cases, you can download the source code and compile it yourself.
This process usually follows steps:
Configure the build system (check dependencies, set options).
Compile the source code.
Check the resulting binaries.
Install the resulting binaries to
prefix
We will try it out in a Docker sandbox.
Start a sandbox in a
gccDocker container; then download GSLdocker run -it --rm gcc mkdir /src && cd /src wget https://ftp.wayne.edu/gnu/gsl/gsl-2.8.tar.gz tar -xvzf gsl-2.8.tar.gz && cd gsl-2.8Configure, build, check, and install:
./configure
make
make check
make install
Optionally, you may test it by compiling a small program:
/* Save as "test.c" and then compile by `gcc test.c -o test -lgsl` */
#include <stdio.h>
#include <gsl/gsl_sf_bessel.h>

int main() {
    double x = 2.4048; /* first root of J0 */
    double y = gsl_sf_bessel_J0(x);
    printf("J0(%g) = %.18e\n", x, y);
    return 0;
}
# HANDSON: how do you get the above source code in a Docker container?
# HANDSON: suppose that you don't have root access to a machine.
#          Let's install GSL to "/home/me/.local/" instead of the
#          standard location "/usr/local/".
#          How do you do it?
#          Hint: run `/configure --help` to see all the different
#          options.
HPC Software Modules
On shared HPC systems, users do not have root access, so they cannot
install software with package managers like apt.
Instead, HPC centers provide software through the
environment modules system.
Modules let you load and switch between different software versions by
adjusting your environment variables (e.g., PATH,
LD_LIBRARY_PATH).
This avoids conflicts and allows multiple versions of compilers,
libraries, and applications to coexist.
Notes for UA HPC:
Education (class) accounts are only available on
ocelote.You must run the command
interactiveto request an interactive compute node before usingmoduleor compiling software.
Log in to ocelote and switch to ocelote:
ssh NETID@hpc.arizona.edu
shell
ocelote
Request an interactive node (wait for the prompt to change):
interactive
List all available modules:
module availYou should see a long list of compilers, MPI libraries, Python versions, and scientific software.
List currently loaded modules:
module listLoad a specific GSL module:
module load gslCompile the above test program.
# Hands-On: Explore the available modules (`module avail`) and pick
#           one piece of scientific software that looks interesting to
#           you (e.g., `gcc`, `openmpi`, `gsl`).
#           Load it with `module load NAME/VERSION` and try a simple
#           test (e.g., check the compiler version with `gcc
#           --version`, or run `mpirun --version`).
#           Compare the output to what you get without loading the
#           module.
Python Virtual Environments
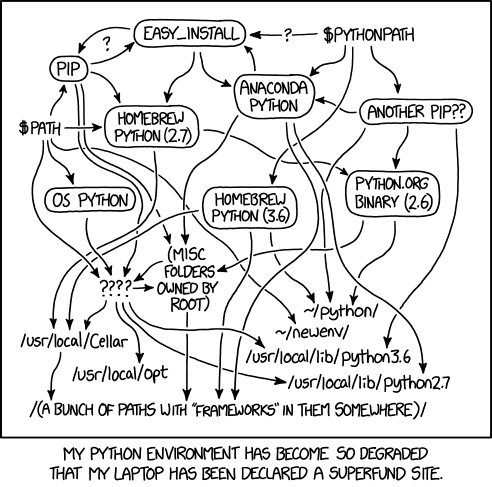
In scientific computing, different projects often need different Python packages, or even different versions of the same package. Installing everything system-wide can quickly lead to dependency conflicts, a.k.a. “package hell”.
A virtual environment solves this problem by creating an isolated Python workspace where you control exactly which packages are installed, independent of the system or other projects. This is similar to HPC modules, but focused on Python.
On your system or HPC node, check the default Python version. Then use
venvto create a directory to store all information in a virtual environment.python3 --version python3 -m venv ~/.venv/astr501Activate the virtual environment by sourcing the “activate” file.
. ~/.venv/astr501/bin/activate
Use
pipto install packages with specific versions, e.g.,pip install numpy=2.0.0Check your virtual environment does contain the specific package version:
pip freeze | grep numpy
Exit the virtual environment and check that your system packages are not affected.
deactivate
pip freeze | grep numpy  # this is the system pip
# HANDSON: create a new virtual environment for your research
#          project, e.g., `galaxy-env` or `blackhole-env`.
#          Install astronomy package that is not in the system Python
#          (e.g., `yt`, `plasmapy`)
#          Write a short Python script that uses your chosen package
#          and run it inside the environment.
#          Verify that this package is not available in the system
#          Python after deactivation.
Containers for Reproducibility
So far we have seen:
Package managers install software at the system level.
Building from source gives flexibility when no package exists or customization is needed.
Modules solve the resolve software versions and “no root access” problem on HPC and shared workstations.
Virtual environments isolate Python packages.
A container (e.g., Docker) can bundle all of these layers, from operating system, compilers, libraries, and Python packages, into a single portable image. This ensures that your code will run the same way on your laptop, an HPC cluster, or the cloud.
Interactive Docker
We already used Docker to create sandbox above. Let’s now dive deeper on what it actually did. There are many training materials about Docker online, including this CyVerse workshop. Depending on the time, we may go through the workshop or run the following simple example.
Pull and run a Jupyter-ready scientific Python container:
docker run -it --rm python:3.13-slim bashThis gives you a minimal Python environment in a clean container.
Inside the container, install useful Python packages and test it:
pip install numpy astropy
python -c "import numpy, astropy; print(numpy.__version__, astropy.__version__)"
Bind Mount
Containers are isolated, but you can share files between your computer and the container using a volume mount.
On your host machine, create a small Python script:
# Save as "astrotime.py"
from astropy.time import Time
t = Time.now()
print(f"The current UTC time is {t.isot}")
Run the container and mount the current directory:
docker run -it --rm -v $(pwd):/workspace python:3.13-slim bashNote that this is a “new” container and does not have
astropy. Reinstall it by running:pip install numpy astropyRun the host script by:
python3 /workspace/astrotime.pyThe script should print the current UTC time, proving the container can access your local files.
Dockerfile
Installing packages interactively inside a container works for quick tests, but it is bad for science: the steps are not recorded, so the environment cannot be reliably reproduced or shared.
The recommanded solution is to use a “Dockerfile”, a text file that declares exactly how to build the container, including the base image and all dependencies. This makes the environment documented, reproducible, and portable, which is essential for scientific research.
On your host system, create a file called Dockerfile:
# Save as "Dockerfile"
FROM python:3.13-slim
RUN pip install numpy astropy
WORKDIR /workspace
COPY astrotime.py .
CMD ["python3", "/workspace/astrotime.py"]
Build a Docker image named
astro-envby running:docker build -t astro-env .Once the build process succeeds, you can list your images with:
docker imagesTip: It is good practice to tag images with version numbers, especially for scientific work. For example:
docker build -t astro-env:1.0 .This makes it clear which version of the environment was used for your results and helps ensure reproducibility.
Run it by:
docker run --rm astro-envThe container installs everything and automatically runs your script.
# HANDS-ON: build your own research environment.
#
#           1. Edit the `Dockerfile` to include at least one tool or
#              library you use in your research (e.g., `astropy`,
#              `scipy`, `matplotlib`, `gsl`, `cfitsio`).
#           2. Build the image with a clear name and version.
#           3. Test it by running a short script or command that uses
#              the software you added.
#           4. Add a brief comment in your Dockerfile explaining what
#              you installed and why.
Containers on HPC and Shared Systems
On UA HPC and many other shared systems, Docker cannot be run directly because Docker usually provide root access to the user. However, you can use Apptainer (formerly Singularity) to run the same container images. Apptainer is designed for HPC environments: it runs containers securely without requiring root access.
Optional: create an Docker Hub account. Push your local Docker image to Docker Hub by
docker tag astro-env DOCKER_USERNAME/astro-env
docker push DOCKER_USERNAME/astro-env
Log in to UA HPC and obtain an interactive node on
ocelote:ssh NETID@hpc.arizona.edu shell ocelote interactive
Run the docker image on Docker Hub as Singularity container by:
apptainer run docker://rndsrc/astro-env
On HPC you cannot run Docker directly, but Apptainer/Singularity lets you use the same images without root privileges. This keeps containers portable across your laptop, the cloud, and HPC systems.
Congratulations! From now on, if software is missing or broken on HPC, you can build a Docker container locally and run it with Apptainer on the cluster.